This quick and tasty breakfast tortilla is perfect for mornings at the
campsite. Soft scrambled eggs, melted cheese, and crispy bacon come together
in a compact, easy-to-eat wrap. Add a burst of freshness with spinach,
avocado, and salsa for a balanced, hearty breakfast ready in minutes!
Servings:1
Ingredients
2 eggs, beaten
1 tortilla
Salt and pepper, to taste
Shredded cheese, to taste
1 small handful of baby spinach
½ avocado
3 tbsp salsa
2 slices precooked bacon
Instructions
Prepare the ingredients: Beat the eggs in a bowl with a
pinch of salt and pepper. Grate the cheese, slice the avocado, and have all
toppings ready.
Cook the bacon: In a skillet over medium heat, crisp the
precooked bacon until golden. Transfer to a paper towel and set aside.
Cook the eggs and cheese: In the same skillet, pour in the
beaten eggs and sprinkle with shredded cheese. Cook over low heat without
stirring until the eggs start to set.
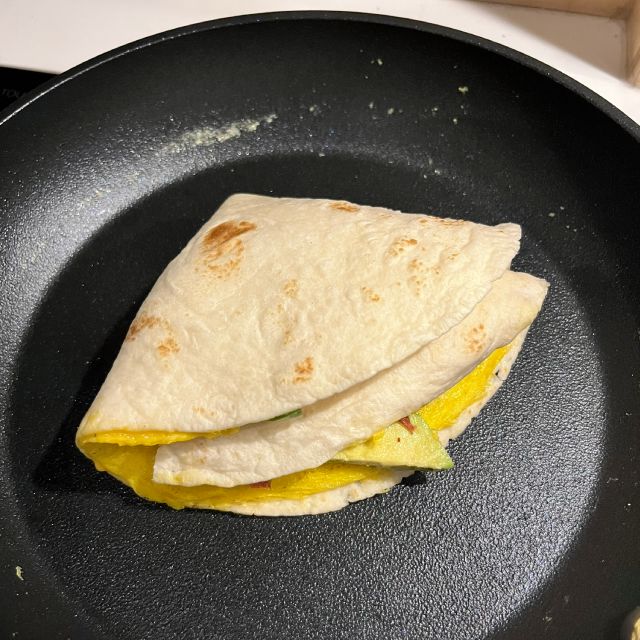
Add the tortilla: Once the eggs are halfway cooked, place
the tortilla on top and cook for 1–2 minutes so it lightly sticks to the
eggs.
Form the wrap: Remove from heat, transfer to a work
surface, and cut a slit from the edge of the tortilla to the centre.
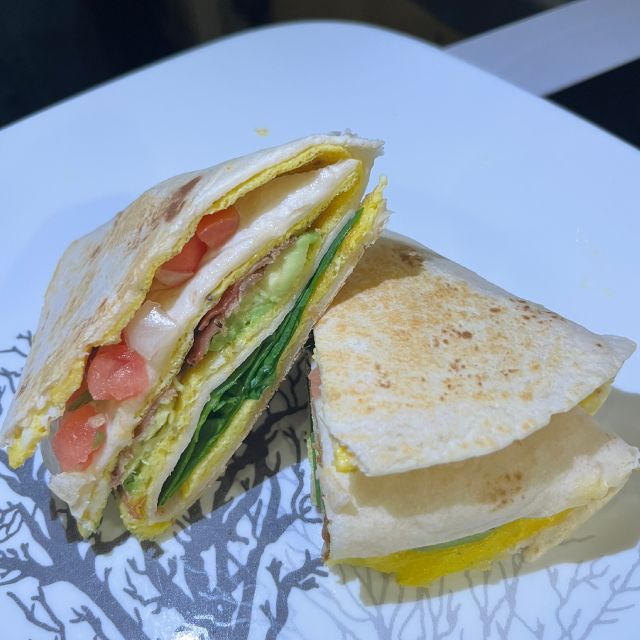
Add toppings and fold: Layer the spinach, avocado, salsa,
and crispy bacon on one quarter of the tortilla. Fold each section over the
next to form a compact triangle.
Grill the wrap: Return it to the skillet and toast for 1–2
minutes per side until golden and crispy.
Serve: Slice in half and enjoy immediately.
Tip
Switch up the ingredients by trying different cheeses or
vegetables depending on your camping menu.
Recipe highlights
Layer the eggs, cheese and tortilla.
Divide the tortilla into quarters and add the fillings.
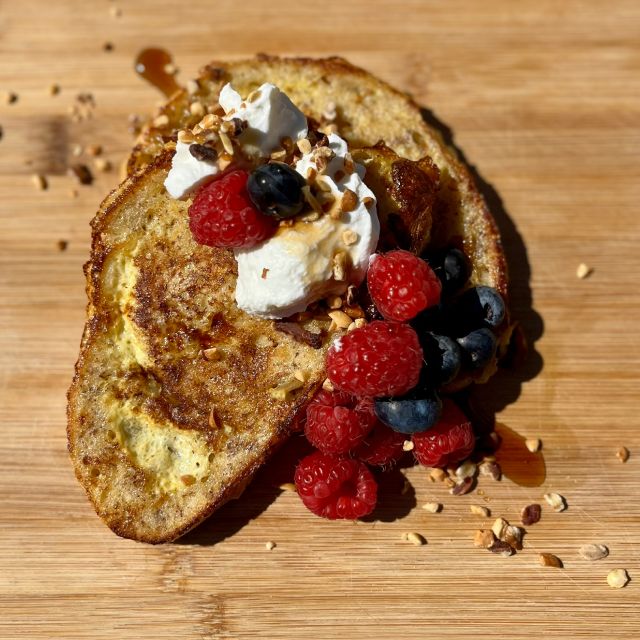
Nothing warms the heart quite like a breakfast made with love. Dad’s French
toast is a comforting classic — perfect for slow mornings or family
brunches. Infused with cinnamon, nutmeg, and vanilla, each slice is golden
brown and served with yogurt, fresh fruit, and a drizzle of maple syrup.
Simple, nostalgic, and delightful for all ages.
Servings:4
Ingredients
For the French toast:
6 eggs, beaten
1½ cups milk
1 teaspoon cinnamon
1 teaspoon ground nutmeg
1 teaspoon vanilla extract
1 tablespoon brown sugar
8 slices of bread
1 tablespoon butter
1 tablespoon vegetable oil
For serving
Plain yogurt
Fresh fruit
Maple syrup
Instructions
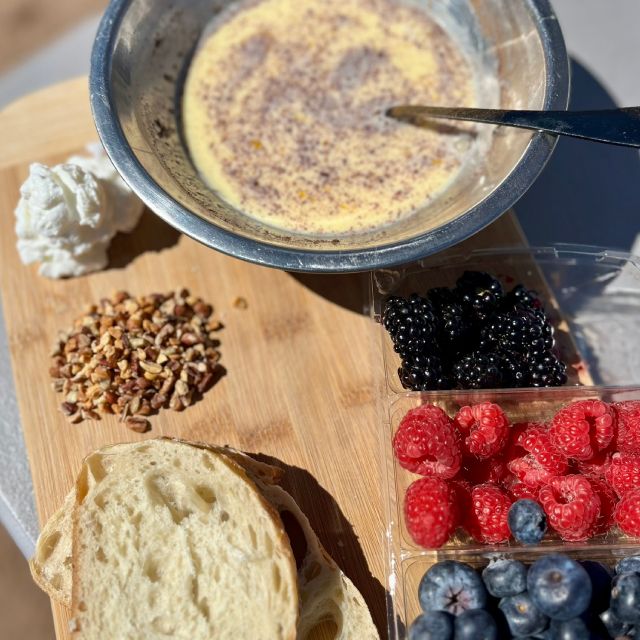
Prepare the French toast mixture: In a shallow dish,
whisk together the beaten eggs, milk, cinnamon, nutmeg, vanilla, and brown
sugar until smooth and slightly frothy.
Soak the bread: Dip each slice of bread into the mixture,
coating both sides without oversoaking. Let excess batter drip off before
placing in the pan.
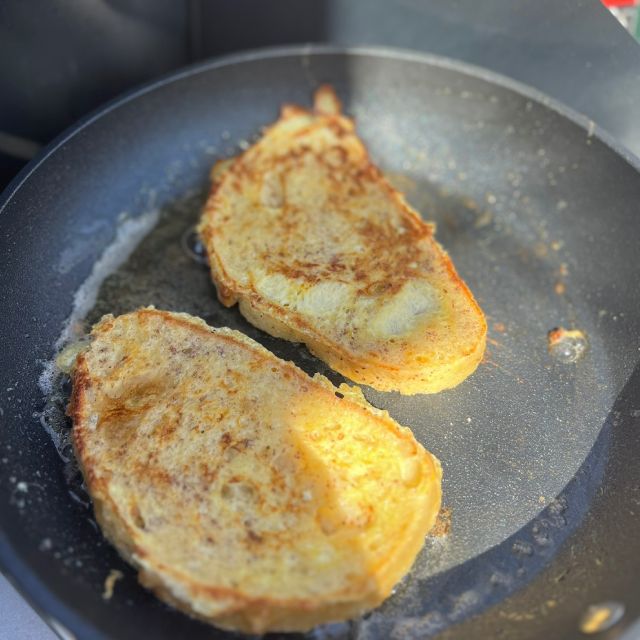
Cook the French toast: In a large skillet, heat the
butter and oil over medium heat until the butter melts and foams. Place
slices in the pan without overlapping and cook for 2–3 minutes per side
until golden and crisp.
Serve and garnish: Arrange on plates and top with yogurt,
fresh fruit, and a generous drizzle of maple syrup.
Tip
This recipe is perfect for using slightly squished bread slices.
You can also prepare the egg and milk mixture ahead of time and
store it in an airtight jar in a cooler for convenient camping
breakfasts.
Recipe highlights
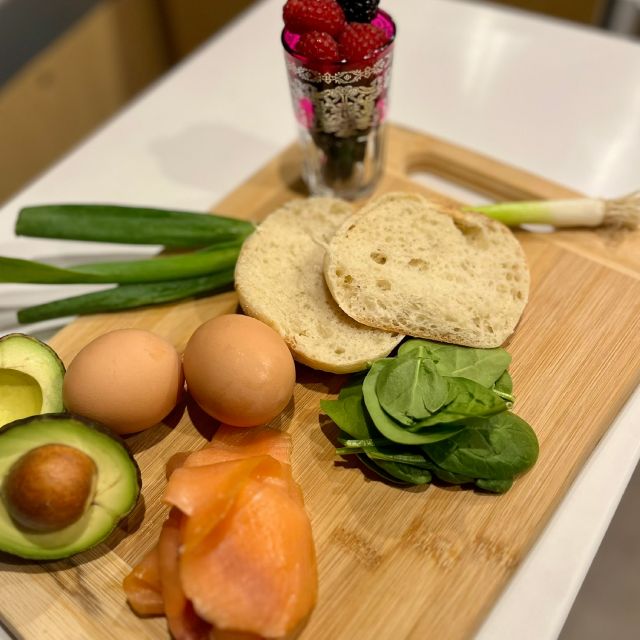
Prepare the french toast mixture and sides.
Dip bread into the egg mixture and fry in a pan.
Cook until golden and garnish with toppings of your choice, like fresh fruit, yogurt and maple syrup.
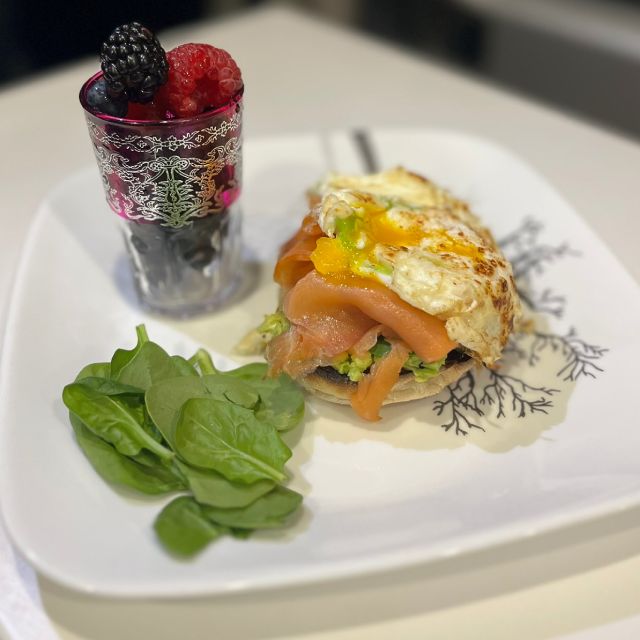
This brunch sandwich is a true explosion of flavours and textures. Between the
crunch of a toasted English muffin, the creaminess of avocado and cream
cheese, the melt-in-your-mouth smoked salmon and eggs, and the sweet touch of
fig jam, every bite is a delight. Perfect for a decadent morning or a refined
brunch, and pairs beautifully with a fresh fruit salad.
Servings:2
Ingredients
1 English muffin
1 avocado, mashed
1 tbsp cream cheese
2 eggs
4 slices bacon
2 slices smoked salmon
1 tbsp fig jam
1 handful baby spinach
Salt and pepper, to taste
Instructions
Prepare the English muffin: Slice in half and toast in a
toaster or on a skillet until golden and crispy.
Cook the eggs and bacon: In a hot skillet, cook the bacon
until crispy. Drain on paper towels. In the same skillet, melt a little
butter and fry the eggs, gently breaking the yolk so it remains creamy.
Assemble the sandwich: Spread cream cheese on one half of
the muffin, then layer mashed avocado, smoked salmon, fried egg, crispy
bacon, and a few baby spinach leaves. Finish with a touch of fig jam.
Serve and enjoy: Pair with a fresh fruit salad for a
balanced and refreshing meal.
Tip
Perfect for using leftover bacon or pre-cooking bacon at home to
save time for a quick breakfast or brunch.
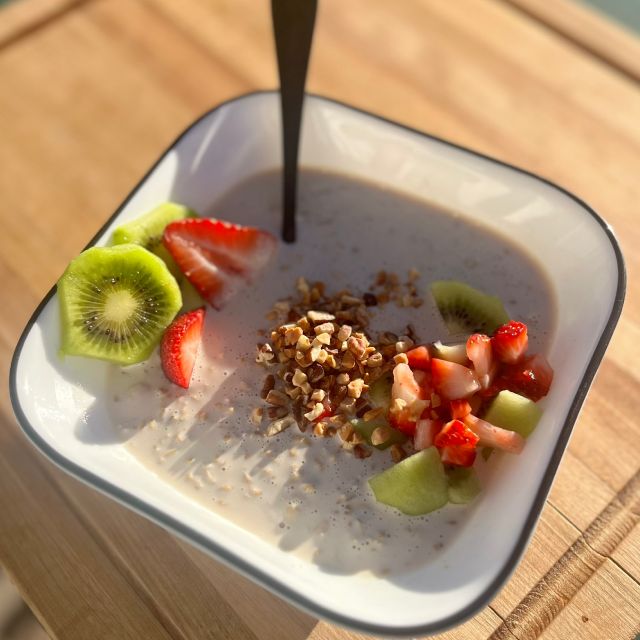
Ready in minutes, nourishing, and endlessly customizable, overnight oats are
perfect for busy mornings or relaxed camping breakfasts. Prepared the night
before, they’re enjoyed cold and creamy with no cooking required, yet still
filling and satisfying.
Servings:1
Ingredients (1 serving)
½ cup rolled oats
⅓ cup milk or plant-based beverage (almond, oat, soy, etc.)
In a bowl, mix the oats, milk, yogurt, maple syrup, and chosen add-ins.
Transfer the mixture to an airtight container.
Refrigerate for at least 2 hours, ideally overnight, so the oats absorb the
liquid and become creamy.
Enjoy as-is or add your favourite toppings before serving.
Tips & Variations
Choose your liquid base: Milk, plant-based
beverages, or even tea infusions, fruit juices, or espresso for
flavour variations.
Play with yogurt: Use plain or flavoured yogurt,
adjusting sweeteners accordingly.
Add flavour with spices and extracts: Try
cinnamon, cocoa powder, coconut milk powder, vanilla or almond
extract, chai spice, or cardamom.
Mix up your toppings: Fresh or dried fruit, nuts
and seeds, nut butters, dark chocolate chips, fruit purée, or
homemade jam for texture and taste.
Tip
Make it your own! Each person can create a unique combination.
Overnight oats are a blank canvas that takes no effort in the
morning but makes a difference in starting your day right.
Recipe highlights
Make your oats different every time — garnish with nuts, fresh fruit, honey, spices — so many choices!
Inspired by classic coastal lobster rolls, this reimagined version highlights
imitation crab in a fresh and crunchy salad. Perfect for a summer lunch or
light dinner, the sandwich combines the sweetness of celery, corn, and red
pepper with tender crab, all brought together by a creamy, slightly spicy
sauce. Served in a toasted bun with baby spinach, it brings seaside vibes
wherever you are.
Servings:6
Ingredients
For the filling:
450 g imitation crab
2 celery stalks, finely diced
½ English cucumber, finely diced
1 red bell pepper, finely diced
1 can corn kernels, drained
½ red onion, finely chopped
6 hot dog buns
Butter
A handful of baby spinach
For the sauce:
½ cup mayonnaise
½ cup plain yogurt
3 tbsp hot sauce of your choice
2 tsp Old-style mustard
Juice of 1 lemon
Salt and pepper, to taste
Instructions
Prepare the sauce: In a bowl, mix mayonnaise, yogurt, hot
sauce, mustard, and lemon juice. Season with salt and pepper and whisk until
smooth. Refrigerate until ready to use.
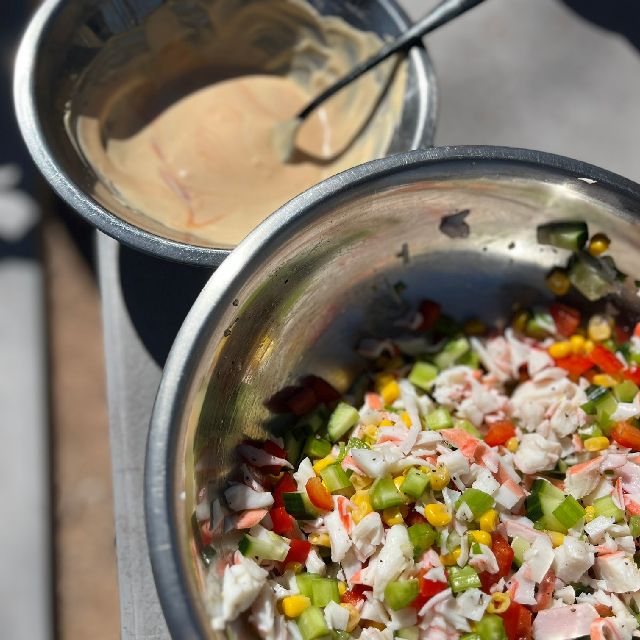
Prepare the filling: Dice the imitation crab, celery,
cucumber, red pepper, and red onion. Combine with drained corn in a large
bowl.
Combine the crab salad: Add the sauce to the chopped
ingredients and mix well to coat evenly.
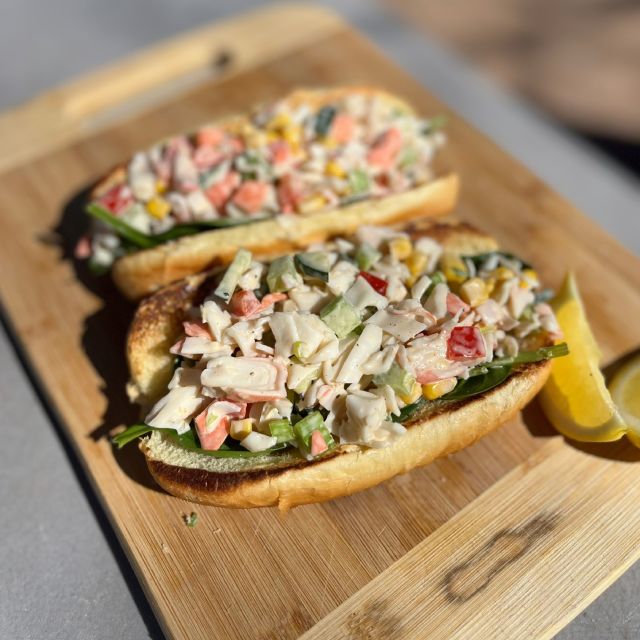
Toast the buns: Lightly butter the inside of each bun and
toast in a hot pan or on a grill until golden and crisp.
Assemble the sandwiches: Place a few baby spinach leaves in
each toasted bun, then generously fill with the crab salad mixture.
Serve and enjoy: Serve immediately with a side of crunchy
coleslaw and crispy chips.
Tip
Switch up the bread depending on what you have for other meals, or use this recipe to finish off leftover hot dog buns.
Recipe highlights
Chop ingredients into bite-sized pieces.
Stir the sauce into the sandwich mixture.
Lightly toast the buns until golden.
Add a squeeze of lemon for a bright, summery finish and enjoy.
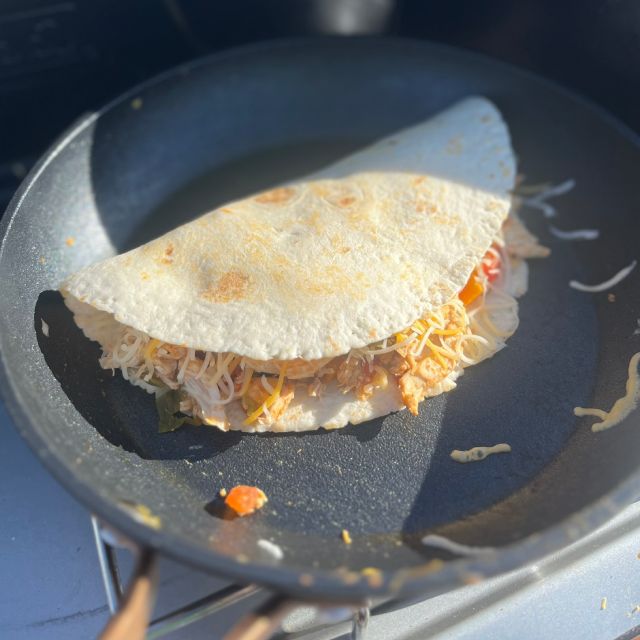
Craving a meal that’s simple, tasty, and quick to prepare? These roasted
chicken quesadillas combine bold, comforting flavours thanks to hot sauce,
salsa, and gooey melted cheese. They come together in just a few easy steps
and are best enjoyed with sour cream and extra salsa for the perfect bite
every time.
Servings:4
Ingredients
2 green onions, sliced
1 red bell pepper, chopped
2 cups cooked chicken, roughly shredded
1 cup store-bought salsa
Hot sauce, to taste
8 tortillas (20 cm / 8 in)
2 cups shredded cheese
Salt and pepper, to taste
Oil
Sour cream, for serving
Extra salsa, for serving
Instructions
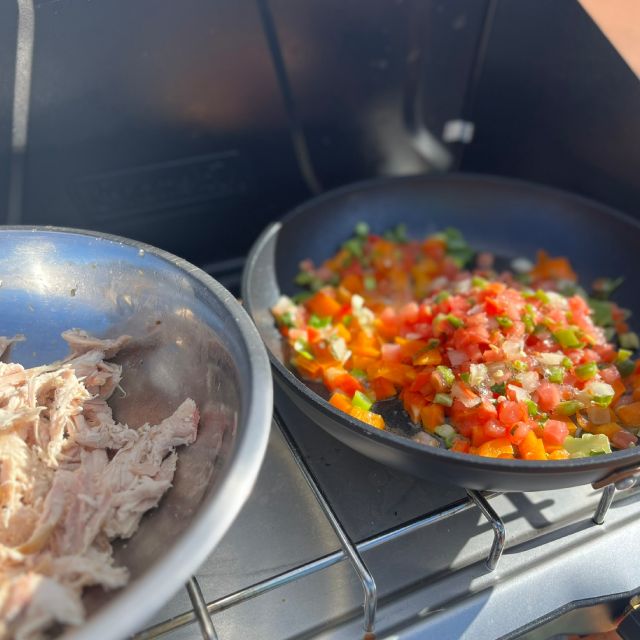
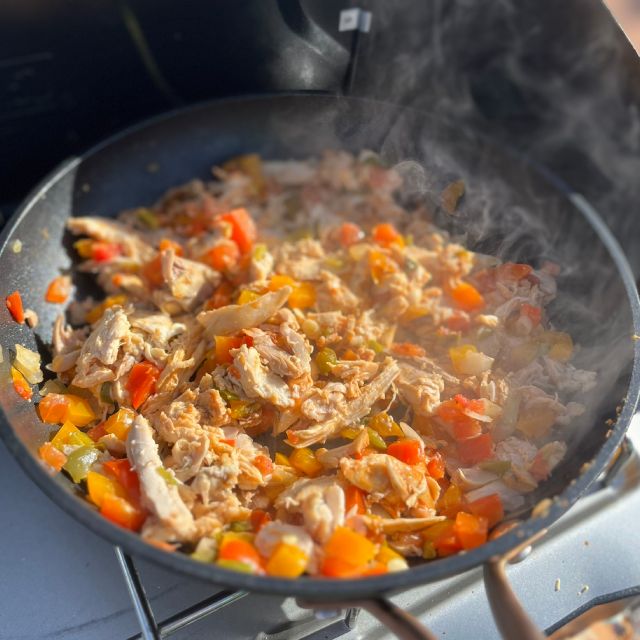
Prepare the filling: In a large skillet, heat 2 tbsp oil
over medium heat. Sauté the green onions until lightly golden. Season with
salt and pepper, then transfer to a bowl to cool slightly. Add red pepper,
chicken, salsa, and hot sauce to taste. Mix well and set aside.
Assemble the quesadillas: Lay tortillas flat, sprinkle ¼
cup cheese on one half of each, spoon the chicken mixture over the cheese,
and fold tortillas in half, pressing gently to seal.
Cook the quesadillas: In two large non-stick skillets, heat
1 tbsp oil over low heat. Cook quesadillas for about 3 minutes per side,
until golden and crispy.
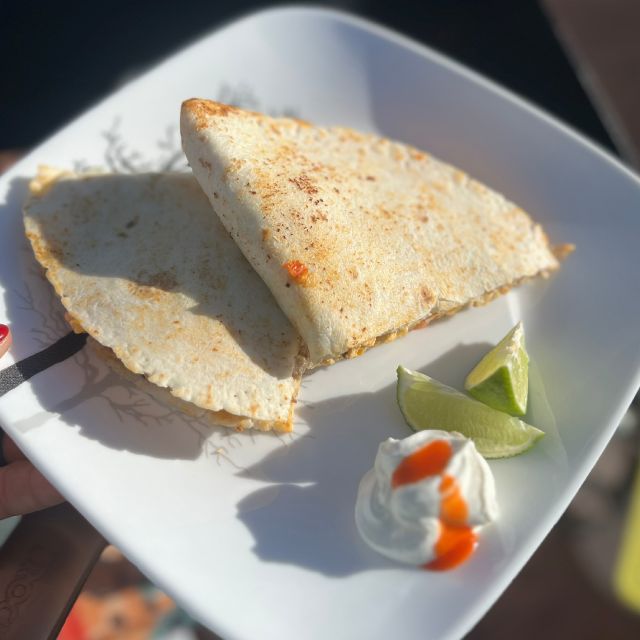
Serve and enjoy: Cut into wedges and serve immediately with
sour cream and extra salsa on the side.
Tip
Switch up the protein! Try cooked chicken, black beans, tempeh, or your favourite ground meat.
Recipe highlights
Prepare ingredients and get ready to cook.
Simmer the quesadilla filling to bring all the flavours together.
Add cheese and cook the quesadilla until golden and crisp.
Deluxe ramen — a comforting bowl with bold flavours
Turn an ordinary packet of ramen into a gourmet, flavourful meal with this
recipe enhanced by coconut milk, crunchy peanut butter, and spicy chili crisp.
The rich, fragrant broth pairs beautifully with your favourite protein — tofu,
shrimp, pork, or a soft-boiled egg. Quick and easy to make, this deluxe ramen
warms you up after a long day outdoors or whenever you’re craving a
comforting, flavour-packed dish.
Servings:1
Ingredients
1 store-bought ramen soup packet of your choice
1 green onion, thinly sliced
½ cup mushrooms, sliced
1 tsp fresh ginger, finely chopped
½ cup coconut milk
⅓ cup crunchy peanut butter
Protein of choice: tofu, shrimp, pork, or egg
2 tbsp chili crisp
1 lime, cut into wedges
Instructions
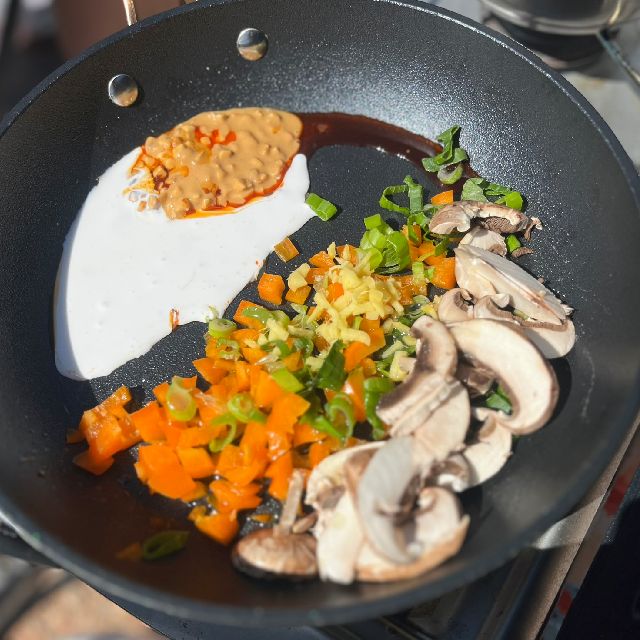
Prepare the aromatic base: In a pan, heat the chili crisp
over medium heat. Sauté the green onion, ginger, and mushrooms until lightly
golden and fragrant. Remove from heat, add the coconut milk and peanut
butter, and stir until smooth and well combined.
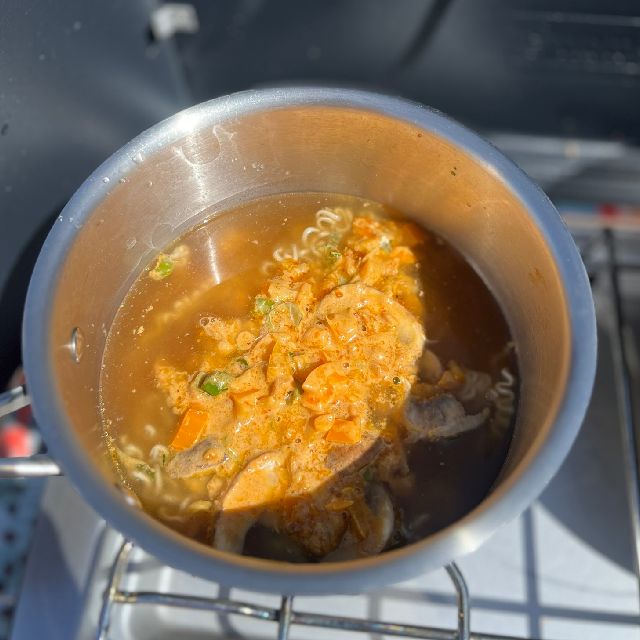
Prepare the broth: In a saucepan, bring the amount of water
indicated on the ramen packet to a boil. Add the seasoning packet and stir
in the prepared aromatic mixture.
Cook the noodles and protein: Add the noodles and cook for
about 3 minutes, stirring to coat them well in the broth. Meanwhile, cook
your chosen protein if needed, and add it to the bowl when serving.
Serve and enjoy: Garnish with sliced green onions and a
wedge of lime for a touch of freshness. Enjoy immediately, adjusting the
flavour with a squeeze of lime juice or an extra spoonful of chili crisp to
taste.
Tip
Endless flavour combinations await! Swap ingredients in the aromatic base to make it your own — try replacing the chili crisp with gochujang for a deeper, slightly sweet heat, and top with kimchi for a tangy, spicy kick.
Recipe highlights
Prepare your favourite ramen ingredients.
Gently simmer the broth over a camp stove.
Top the ramen with fresh green onions and enjoy this comforting meal.
Easy to prepare and full of flavour, these chicken and apple wraps are a great
option for an outdoor meal. Fresh, nourishing, and balanced, they combine the
crispness of apples and cucumbers with the tenderness of chicken, all wrapped
in a soft tortilla. Perfect for a quick lunch by the lake or a light dinner
after a day of hiking.
Servings:3
Ingredients
3 cups cooked, shredded rotisserie chicken
1 cup celery, diced
1 green apple, diced
2 green onions, chopped
½ English cucumber, cut into sticks
1 cup fresh basil, chopped
⅓ cup mayonnaise
1 tbsp Old-style mustard
1 tbsp apple cider vinegar
Salt and pepper, to taste
1 cup baby spinach or arugula
4 tortillas
Herb and garlic cream cheese
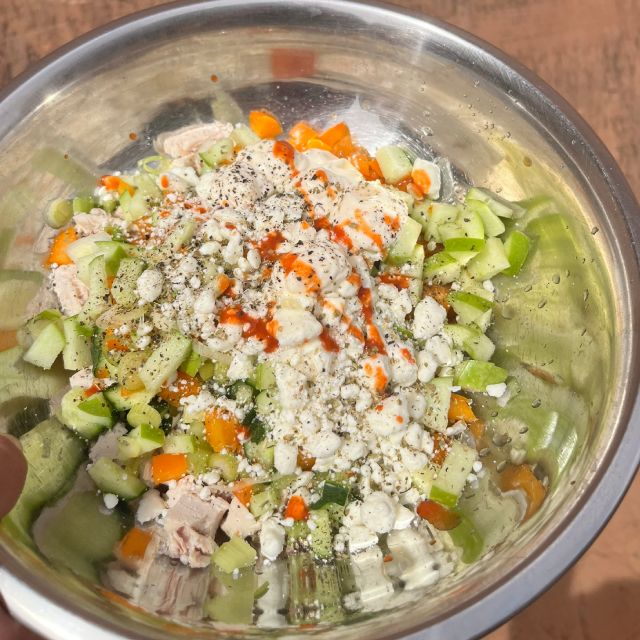
Instructions
Prepare the chicken and apple salad: In a large bowl,
combine all salad ingredients except the cucumbers and spinach. Mix well to
evenly coat and distribute the flavours.
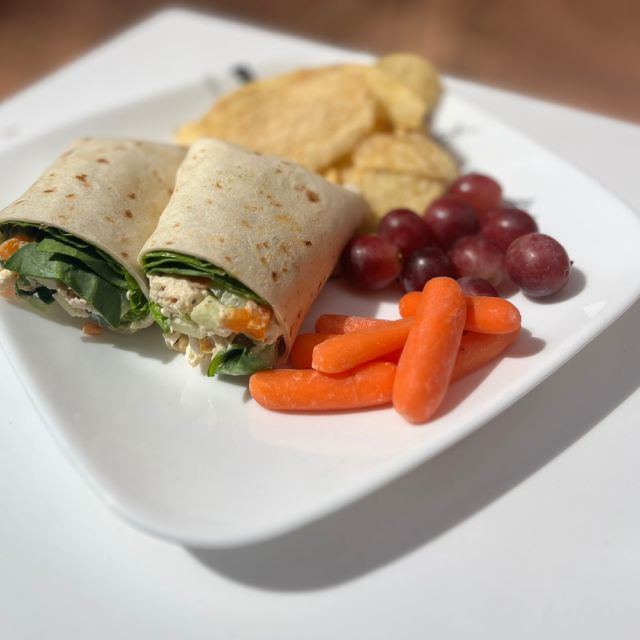
Assemble the wraps: Spread a thin layer of cream cheese on
each tortilla. Arrange the cucumbers and spinach on the top half. Spoon the
chicken salad mixture into the centre. Fold the bottom of the tortilla over
the filling, then fold in the sides toward the centre to form a secure wrap.
Wrap each one in parchment paper for easier handling.
Tip
Prepare the chicken salad mixture at home and store it in a sealed container. At the campsite, add delicate ingredients like spinach and cucumber, then assemble and roll — no chopping or mixing needed on-site!
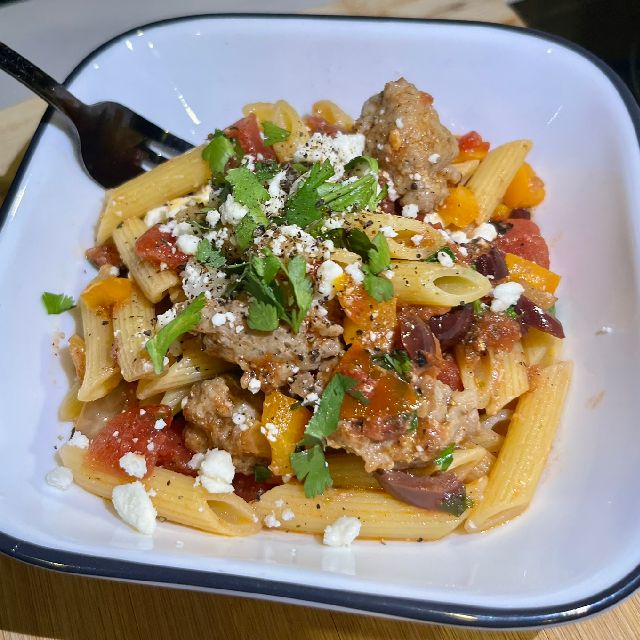
This Mediterranean-inspired pasta dish combines simplicity with indulgence.
The crispy sausages, Kalamata olives, and feta create the perfect balance of
richness and freshness, while cumin adds a subtle spice that ties it all
together. Ready in under 30 minutes, it’s perfect for a comforting meal with
bright flavours.
Servings:4
Ingredients
2 cups penne pasta
3 sausages of your choice
1 small onion, diced
1 yellow or orange bell pepper, diced
1 bunch fresh cilantro, chopped
½ cup crumbled feta cheese
½ cup Kalamata olives, pitted and roughly chopped
¾ tablespoon cumin
1 can (540 ml) seasoned diced tomatoes
Salt and pepper, to taste
Instructions
Prepare the ingredients: Remove the sausage casings and cut
the meat into bite-sized pieces. Dice the onion and bell pepper, chop the
cilantro, and crumble the feta.
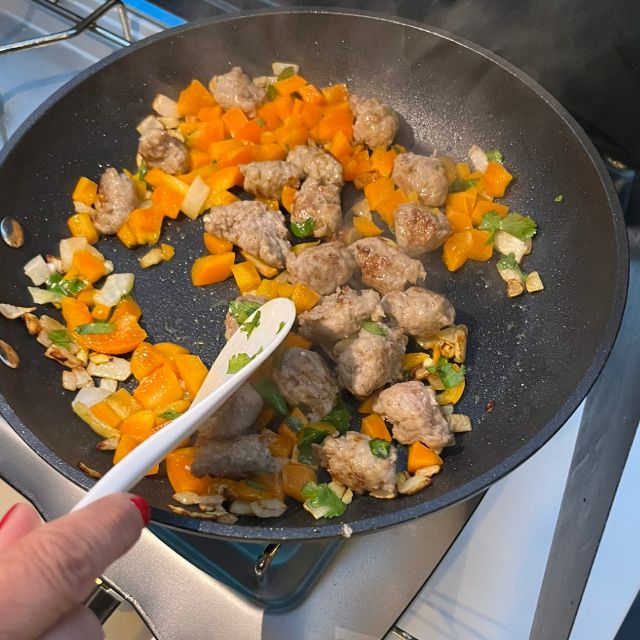
Cook the sausages and onions: In a large skillet over
medium-high heat, sauté the onion with the sausage pieces until browned and
crispy.
Cook the pasta: Bring a large pot of salted water to a
boil. Cook the pasta until al dente, then drain and set aside.
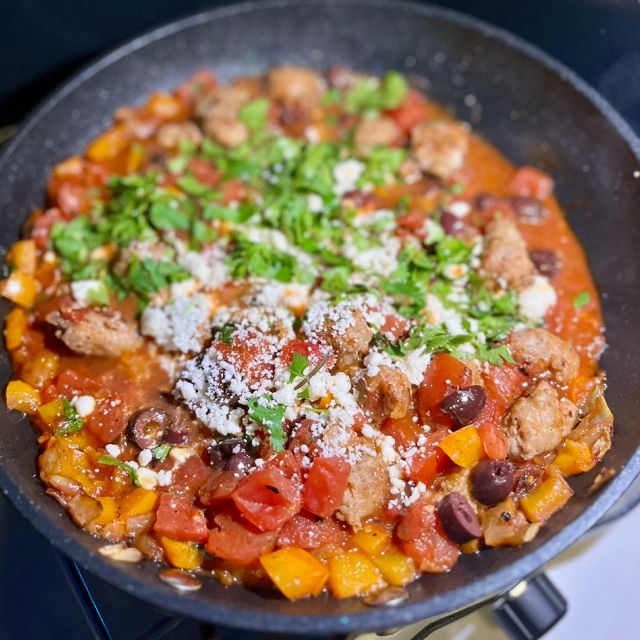
Add the vegetables and spices: Stir in the bell pepper and
sauté for 2 minutes. Add the canned tomatoes, olives, and cumin. Reduce heat
and simmer 3–4 minutes.
Finish the sauce: Add the crumbled feta and chopped
cilantro. Season with pepper and gently mix.
Assemble the dish: Add the drained pasta to the sauce and
stir well to coat.
Serve and enjoy: Divide into bowls, garnish with extra
cilantro and feta, and serve immediately.
Tip
Cook your pasta ahead of time and add it when finishing the sauce to reheat it.
Recipe highlights
Cut up all your ingredients.
Cook sausage, peppers, and onion until lightly browned.
Add remaining ingredients and let the flavours come together.
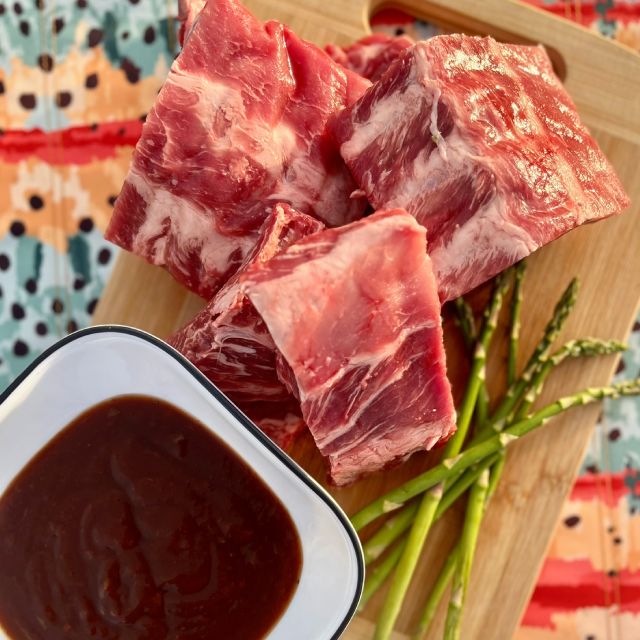
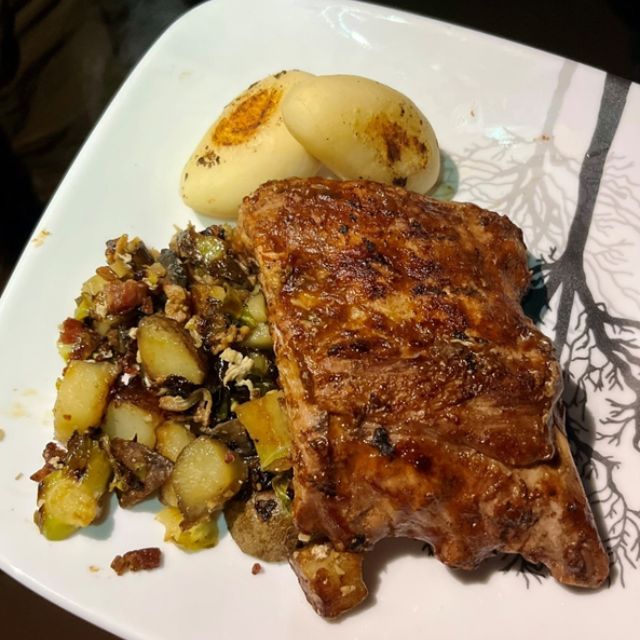
Nothing brings family and friends together quite like a hearty meal of ribs
grilled over an open fire. This recipe guarantees tender, fall-off-the-bone
meat and an irresistible flavour thanks to a sweet-and-savory homemade
barbecue sauce with just the right kick. Perfect for summer dinners around the
fire.
Servings:4
Ingredients
Pork back ribs – plan for 4 to 5 ribs per person
Store-bought or homemade barbecue sauce
For the homemade barbecue sauce – makes about 1 cup:
½ cup ketchup
¼ cup water
¼ cup soy sauce
2 tbsp maple syrup
2 tbsp old-style mustard
2 tsp apple cider vinegar
½ tsp smoked paprika
½ tsp onion powder
Instructions
Prepare the ribs: Remove the thin membrane from the back of
the ribs for maximum tenderness. Cut the racks into sections of 3 to 4 ribs
to make them easier to cook.
Boil the ribs: Bring a large pot of water to a boil—enough
to fully cover the ribs. Add the rib sections and simmer over medium heat
for 20–30 minutes, until tender.
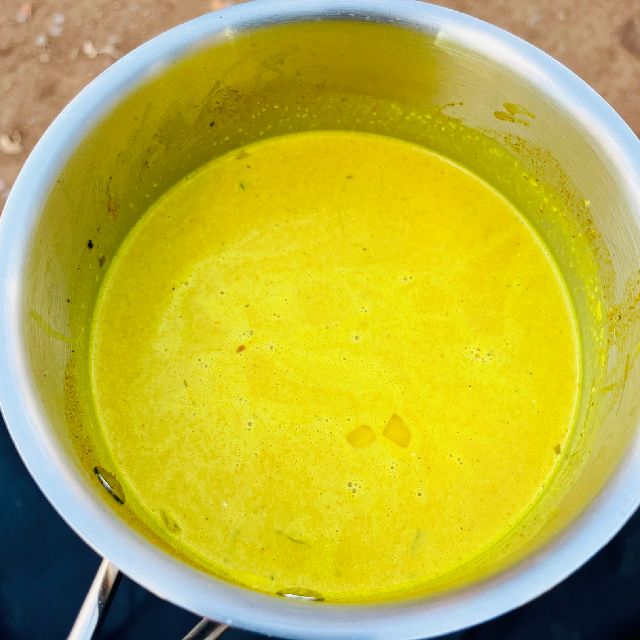
Make the barbecue sauce (if using homemade): In a saucepan,
combine all the sauce ingredients. Bring to a boil, then reduce the heat and
simmer for 5–10 minutes, until slightly thickened.
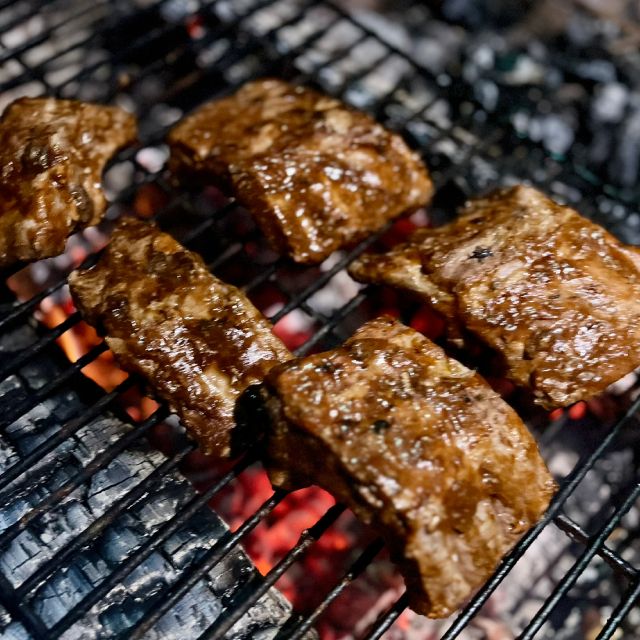
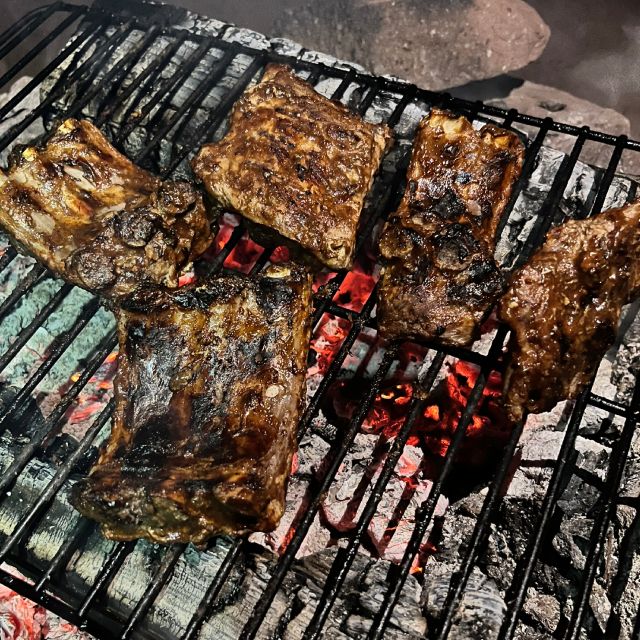
Grill the ribs: Drain the ribs and brush them generously
with barbecue sauce. Place them on a hot grill over the fire or on a
barbecue set to medium-high heat. Grill for 2–3 minutes per side, turning
and brushing with more sauce as needed for a richer flavour.
Serve: Serve the ribs with crisp coleslaw and your choice
of grilled vegetables.
Tip
You can boil the ribs ahead of time and refrigerate them until grilling. Watch closely on the fire—they’ll cook faster and can dry out more easily than freshly boiled ribs. You can also prepare your homemade barbecue sauce a few days in advance and store it in an airtight jar until you’re ready to cook.
Recipe highlights
Prepare your ribs and homemade barbecue sauce.
Cook ribs over campfire embers or on a barbecue.
Grill until caramelized with a slight char.
Don’t be afraid to get messy! Serve with potatoes or corn on the cob.
When the evenings turn cooler, there’s nothing better than a warm, nourishing,
and aromatic dish to cozy up with. This red lentil dahl, inspired by Indian
cuisine, bursts with flavour from turmeric, garam masala, and ginger. Its
creamy texture and gentle heat make it the perfect meal for crisp fall or
winter days. Served with basmati rice, naan, and a dollop of yogurt, it brings
comfort and warmth in every bite.
Servings:4
Ingredients
For the dahl:
1 onion, finely chopped
2 tbsp butter
3 garlic cloves, finely chopped
1 piece of fresh ginger (about 1 inch), peeled and halved
1 tbsp ground turmeric
1 tbsp garam masala
1 tsp ground cumin
Sriracha sauce, to taste
2 cups vegetable broth
2 cups coconut milk
1½ cups red lentils
Salt and pepper, to taste
To serve
Plain yogurt
Fresh cilantro
Lime wedges
Naan
Basmati rice
Instructions
Sauté the aromatics: In a large saucepan, melt the butter
over medium heat. Add the onion, season with salt and pepper, and cook for
3–5 minutes, until translucent. Stir in the garlic, ginger, turmeric, garam
masala, and cumin. Cook for 1 minute, stirring, until the spices become
fragrant.
Add the liquids and lentils: Pour in the vegetable broth
and coconut milk. Add the red lentils and bring to a boil.
Simmer: Reduce to low heat and simmer for about 20 minutes,
stirring occasionally, until the lentils are soft and the mixture has
thickened. Remove the ginger pieces and adjust seasoning with salt, pepper,
and sriracha to taste.
Serve and garnish: Serve warm over basmati rice. Top with
plain yogurt and fresh cilantro.
Tip
Serve with lime wedges and warm naan toasted over the fire or on the stove for an authentic touch.
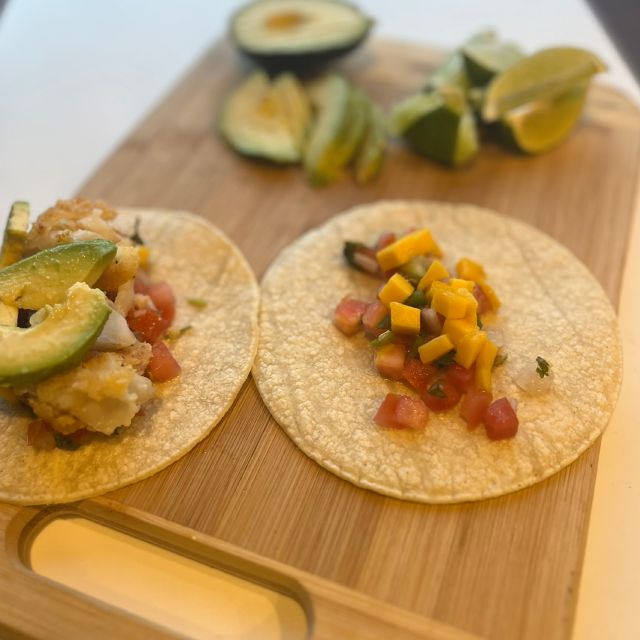
There’s nothing like a good fish taco to turn an outdoor meal into a real
feast. Inspired by Mexican flavours, this recipe combines crispy white fish,
fresh mango salsa, a creamy and zesty sauce, and colourful toppings made from
crunchy vegetables and fresh herbs. Perfect for camping or casual outdoor
meals, these tacos are festive, satisfying, and crowd-pleasing.
Servings:6
Ingredients
For the fish tacos:
24 small white corn tortillas
700 g (about 1½ lb) white fish of your choice, cut into pieces
1 cup panko breadcrumbs
2 eggs, beaten
½ cup flour
½ tsp ground cumin
½ tsp cayenne pepper
1 tsp salt
¼ tsp black pepper
Vegetable oil
Butter
Toppings
½ small red cabbage, shredded
2 medium avocados, sliced
½ red onion, diced
½ bunch fresh cilantro, tough stems removed
1 cup shredded cheese
1 lime, cut into 8 wedges
Sauce
½ cup sour cream
⅓ cup mayonnaise
2 tbsp lime juice (about 1 medium lime)
1 tsp garlic powder
1 tsp sriracha (or to taste)
Mango Salsa
1 Ataulfo mango, peeled and diced
2 Roma tomatoes, diced
½ red bell pepper, seeded and finely diced
2 green onions, thinly sliced
Sriracha, to taste
1 tbsp lime juice
Instructions
Make the seasoning mix: In a small bowl, combine ½ tsp
cumin, ½ tsp cayenne pepper, 1 tsp salt, and ¼ tsp black pepper. Mix into
the flour.
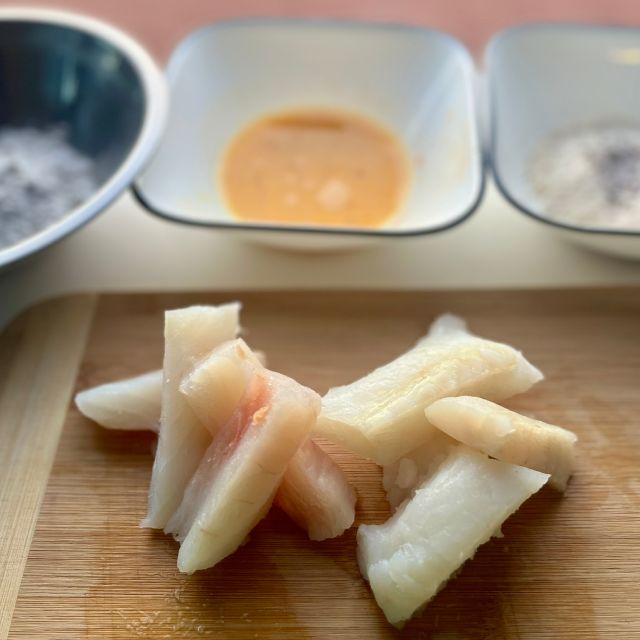
Coat the fish: Set up three bowls: one with the seasoned
flour, one with the beaten eggs, and one with the panko breadcrumbs. Dredge
each piece of fish in flour, dip in egg, and coat with panko completely.
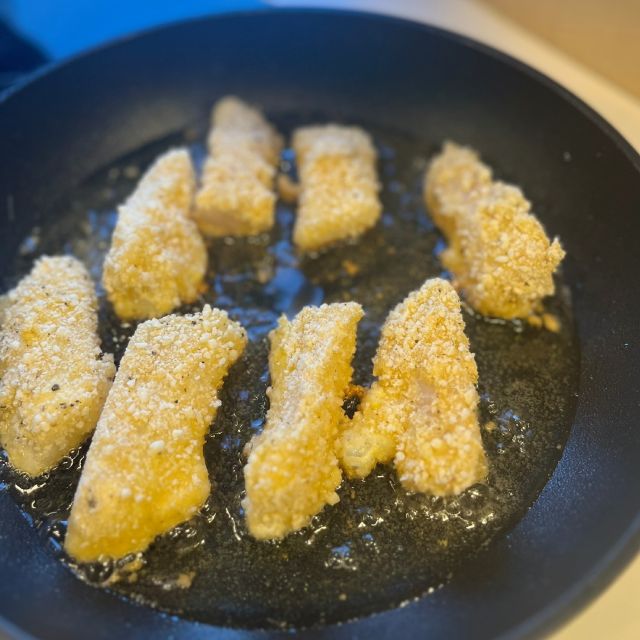
Fry the fish: Heat 3 tbsp olive oil and 1 tbsp butter in a
large skillet over medium-high heat. Fry the fish for 3–4 minutes per side
until golden and crispy. Drain on paper towels and cut into smaller pieces
for tacos.
Warm the tortillas: Toast tortillas briefly over a camp
stove flame or heat in a dry skillet just before serving.
Assemble the tacos: Place fried fish on each tortilla. Add
shredded cabbage, avocado, red onion, cilantro, and shredded cheese. Drizzle
with creamy taco sauce.
Serve: Serve with mango salsa and lime wedges for
squeezing.
Tip
You can prep parts of this recipe ahead of time, like the spice mix or taco sauce, for easy camping meals. For the best flavour, prepare the mango salsa fresh just before eating.
Recipe highlights
Set up your fish breading station.
Shallow-fry the fish until golden.
Assemble fish tacos with mango salsa and your favourite sides.
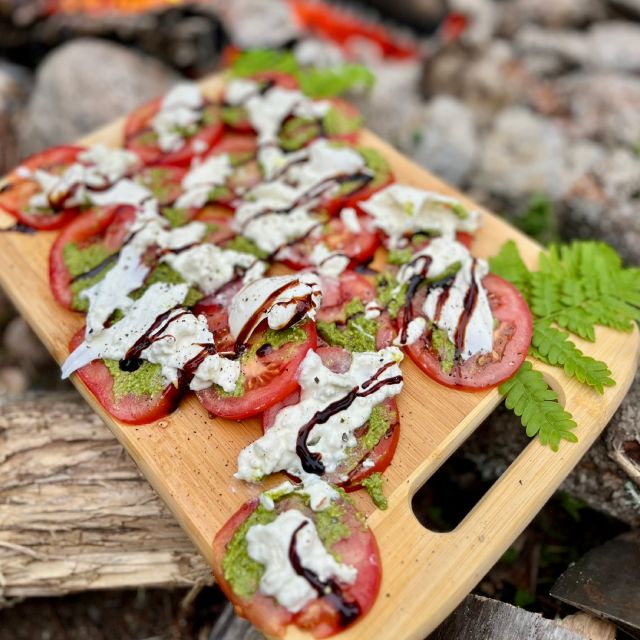
This Mediterranean-style salad is an explosion of freshness and flavour.
Juicy, colourful heirloom tomatoes pair perfectly with creamy burrata,
fragrant pesto, and a touch of sweet balsamic reduction. A drizzle of
garlic-infused olive oil and a few fresh basil leaves complete this elegant
dish — ideal as a refined appetizer or a light meal with crispy baguette
slices.
Servings:4
Ingredients
2 to 3 heirloom tomatoes in assorted colours
250 g burrata cheese
2 garlic cloves, finely chopped
2 tbsp lemon juice
¼ cup olive oil
1 tbsp pesto (store-bought or homemade)
Balsamic reduction (store-bought)
Fresh basil leaves, chopped
1 French baguette
Salt and pepper, to taste
Instructions
Prepare the infused oil: In a small bowl, mix the chopped
garlic, olive oil, and lemon juice. Let sit for at least 10 minutes to allow
the flavours to infuse.
Prepare the tomatoes: Slice the heirloom tomatoes into ½ cm
thick rounds. Arrange them nicely on a serving platter. Season with salt and
pepper.
Assemble the salad: Spoon pesto over the tomatoes,
spreading it unevenly for a rustic look. Gently tear the burrata with a
fork, allowing the creamy centre to flow over the tomatoes. Drizzle with
balsamic reduction for a sweet and tangy touch. Top with the garlic and
lemon-infused oil. Generously sprinkle with fresh chopped basil.
Serve and accompany: Cut the baguette into pieces and serve
alongside the salad — lightly toasted if desired.
Recipe highlights
Pair ripe tomatoes and burrata for an easy addition to any summer meal.
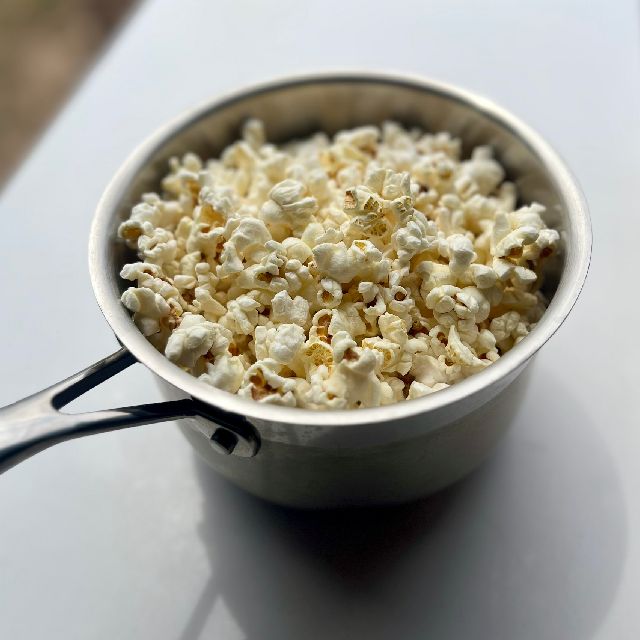
Easy to make, light to carry, and always irresistible, popcorn is the perfect
snack for campfire evenings. Whether you’re enjoying a treat after a day of
adventure or sharing stories under the stars, it’s a crowd-pleaser that can be
customized with all kinds of seasonings — from classic to bold.
Servings:2
Ingredients
Basic popcorn:
¼ cup popcorn kernels
2 tbsp canola oil
Garlic and Parmesan popcorn:
2 tbsp grated Parmesan cheese
⅛ tsp garlic powder
⅛ tsp dried oregano
1–2 pinches salt
Cinnamon sugar popcorn:
½ tsp white sugar
¼ tsp ground cinnamon
1–2 pinches salt
Smoky paprika popcorn:
½ tsp smoked paprika
¼ tsp chili powder
⅛ tsp salt
1 pinch ground black pepper
Optional: add a pinch of cayenne or a drizzle of hot oil for extra heat
Quick salted caramel popcorn:
1 tbsp brown sugar
1 pinch sea salt
¼ tsp vanilla extract
½ tbsp melted butter
Cheese and herb popcorn:
2 tbsp grated cheese (aged cheddar, Parmesan, or Gruyère)
¼ tsp dried thyme
¼ tsp dried rosemary
1 pinch each of salt and black pepper
Coconut chocolate sweet popcorn:
½ tsp unsweetened cocoa powder
½ tsp shredded coconut
1 tsp coconut sugar or brown sugar
1 pinch salt
Optional: add dark chocolate shavings or a drizzle of warm coconut milk for
extra indulgence
Instructions
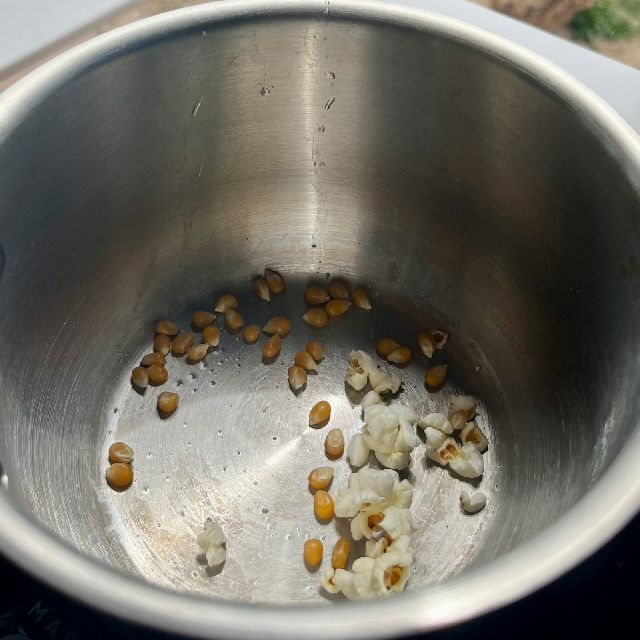
Make the popcorn: In a small or medium pot, pour in the
canola oil, ensuring it coats the bottom evenly. Add just enough kernels to
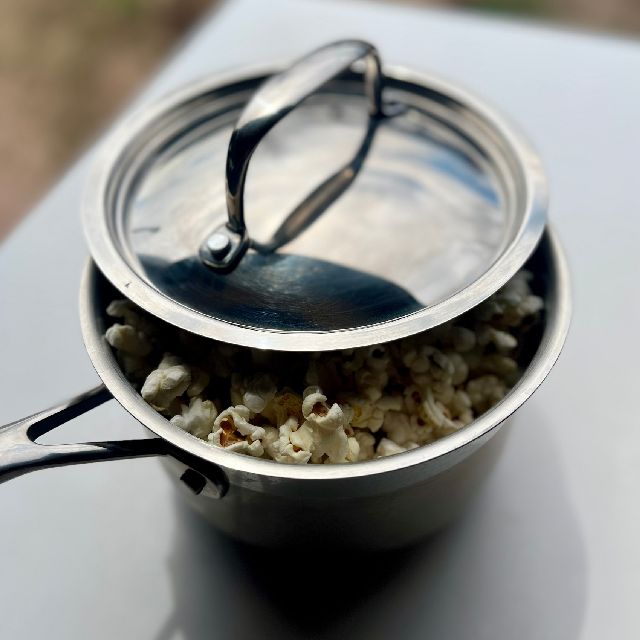
cover the bottom without overlapping. Heat over low heat, cover with a lid,
and allow the kernels to pop. Once popping slows or stops, remove from heat
immediately to prevent burning.
Season the popcorn: While the popcorn is still warm,
sprinkle on your chosen seasoning so it sticks well. Toss gently to evenly
coat each piece.
Tip
Choose a few seasoning mixes to make ahead of time and bring them with you on your camping trip. Once your popcorn is ready, simply sprinkle on your seasoning of choice and enjoy.
Recipe highlights
Add popcorn kernels to a pot with a thin layer of hot oil.
Cover with a lid to keep the popcorn safely in the pot as it pops.
Season the popcorn to your taste.
Enjoy warm popcorn around the campfire. It’s hard to resist!
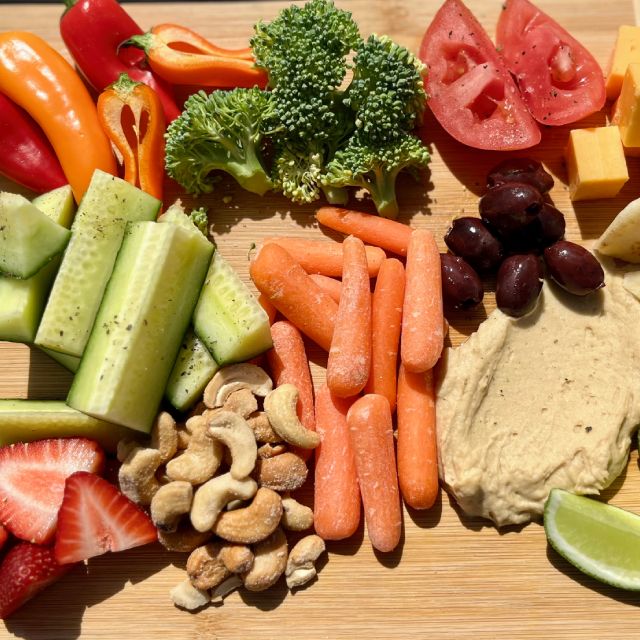
Perfect for a light camping appetizer or a healthy snack to share, this veggie
and hummus platter is as simple as it is delicious. Easy to prepare, it
highlights fresh, crunchy ingredients ideal for a relaxed outdoor moment. With
its vibrant colours and mix of textures, this platter makes a nourishing and
balanced snack — great for campfire gatherings or mid-hike breaks.
Servings:2
Ingredients
Hummus (plain, spicy, or roasted garlic, according to your preference)
Olives (green or black), whole or sliced
Bell peppers (red, yellow, or orange), cut into strips
Carrots, cut into sticks
Mini pitas, cut into quarters or served whole
Cucumbers, sliced into rounds or sticks
Broccoli, cut into small florets
Halloumi cheese, sliced and grilled
Instructions
Prepare the vegetables and cheese: Wash and cut the
peppers, carrots, and cucumbers into sticks or bite-sized pieces. Separate
the broccoli into small, easy-to-dip florets. Slice the halloumi cheese into
thick pieces and grill in a dry pan or on a grill until golden on both
sides.
Assemble the platter: Spread a generous amount of hummus
directly onto a serving board or place it in a bowl. Arrange the vegetables,
grilled halloumi slices, and mini pitas attractively around the hummus. Add
olives for an extra burst of flavour.
Serve and enjoy: Serve immediately and enjoy dipping each
bite into the hummus. For an added touch, drizzle everything with olive oil
and sprinkle with smoked paprika.
Tip
This makes a great picnic lunch! Add any leftovers from your trip to your snack platter to reduce food waste as you near the end of your camping trip.
Recipe highlights
Get creative with your snack platter by adding your favourite veggies, cheeses, or leftovers.
Colourful veggie and hummus platters are perfect for sharing.